
PLEASE REMEMBER: read through the tutorial a number of times to familiarize yourself with the steps BEFORE cutting or starting the process of finishing!
Supplies Needed:
Large Quadrant Ruler
Cutting Mat
Scissors
Mat Knife
Straight Pins
Mat Board
Spray Tacky Glue
White Tacky Glue
Cotton Batting
Grommets and a Crop-o-Dile
Twine or Cording
Complimentary Fabric
Stitched piece
The Tag ornament (originally posted 12/5/14) has become a very popular finish on the web. It is important to note however it is most suitable for smaller sized projects (in most cases) as the tag can become very large in size. Why? because we are incrementally making it larger with each "layer" please keep this in mind as you determine if it is the correct finish for your project.
Step 1:
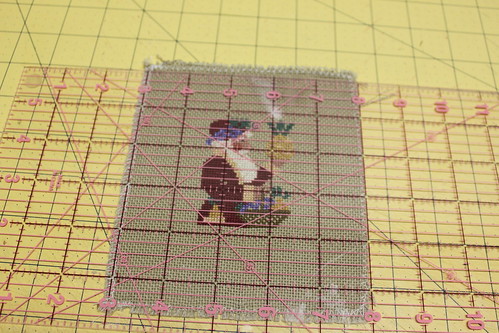
Measure your stitched piece to determine the size of the top layer of tag ornament.
You can see that a 3 x 3 inch ornament will fit the design nicely in this case, leaving a very narrow margin along the mounting edge. This is what we want for a tag ornament.
PLEASE NOTE: do NOT cut at the margin line, that is simply the size of mounting board we are going to cut. PLEASE leave at least 1 inch of fabric around the design from the edge of the stitching on all sides for the mounting process.
Step 2:
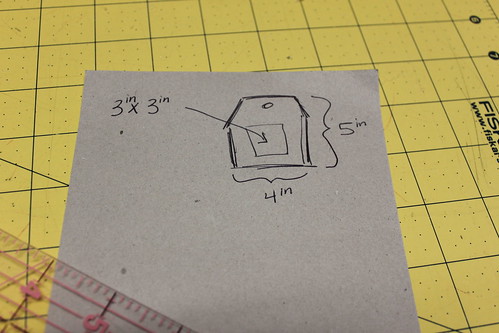
Make your plan... I like to draw out my thoughts including sizes for a visual reference on a scrap piece of paper.
Step 3:
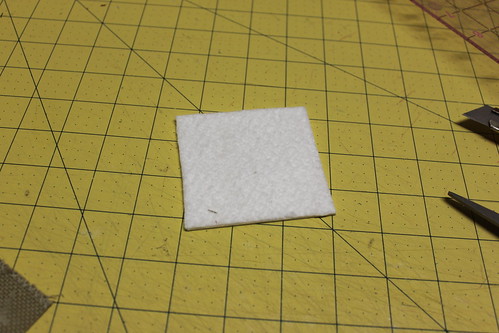
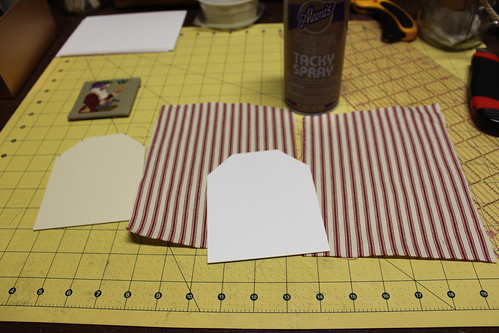
Cut your top layer mat board (mine is 3 x 3 inches as described above ~ YOURS will be what you have determined). Spray lightly with Aleene's Tacky Spray glue (available at any craft/hobby store or Wal-Mart).

and put a layer of cotton batting on the mat board and trim to edge of mat board
Step 4: Mount your stitching and glue the sides to back (see comment above in Step One about margins!) with White Tacky Glue
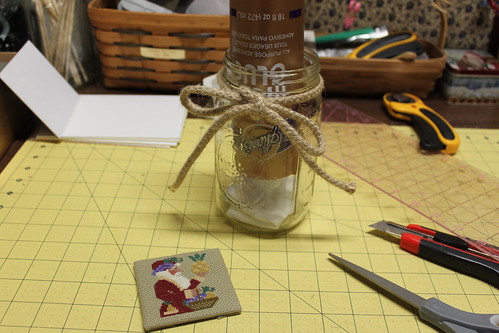
*helpful hint for finishing pros* I put my glue upside down in a large mouth mason jar to always keep it ready for use rather than having to shake it down multiple times and squeezing. Saves my hands and joints!
Step 5:
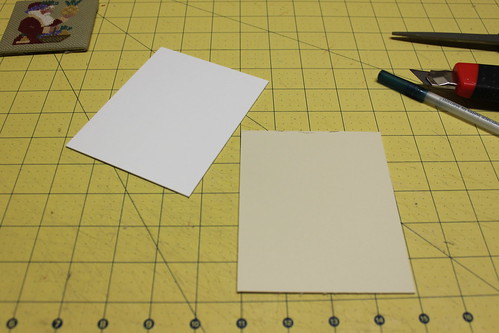
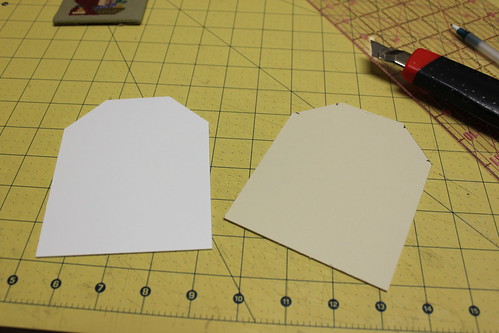
Cut the "tag" pieces. You will need two pieces the same size for front and back of the tag.
As per my blueprints above in STEP ONE mine is: 4 x 5 inches
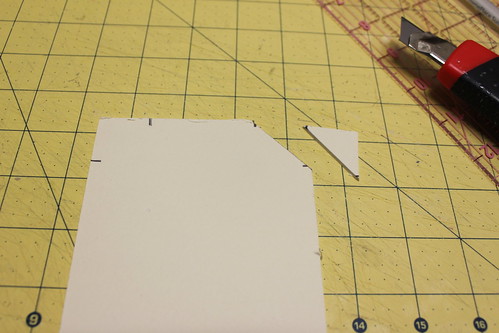
Step 6:
Using a ruler find a "center" for your tag, mark the center area. Since mine is 4 inches wide, I use a center space of 2 inches. You change this center space according to your own personal measurements and projects.
*Please follow the steps outlined below in words and pictures for making your tag perfectly matching on both the front and back.
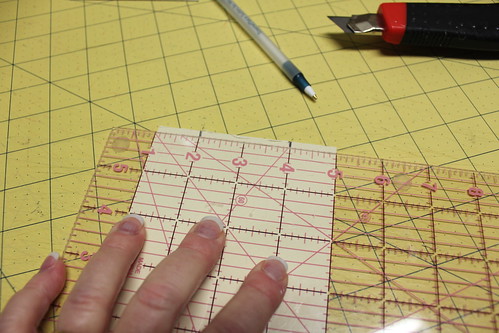
then, rotate 90 degrees and make a mark on the side corner 1 inch down from top edge on both sides.
You will have something looking like this:

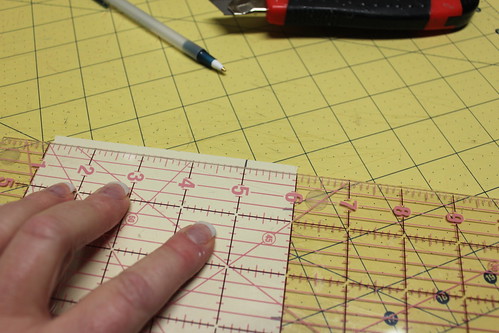
Taking a straight edge match the edge of the corner marks

draw a line:
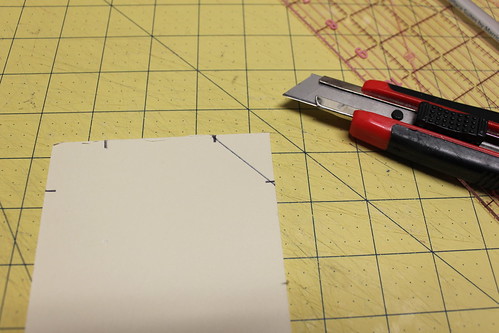
Now cut! Now this will be your corner template for all the other corners so that all corners match on your tag.
*Please View the following photos to understand the "template" theory:

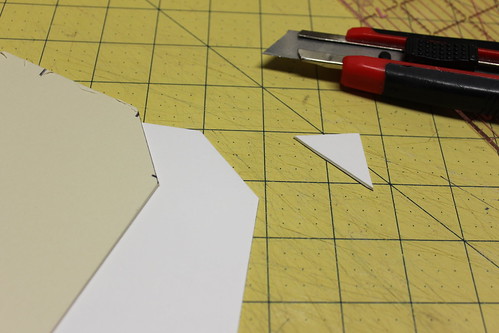
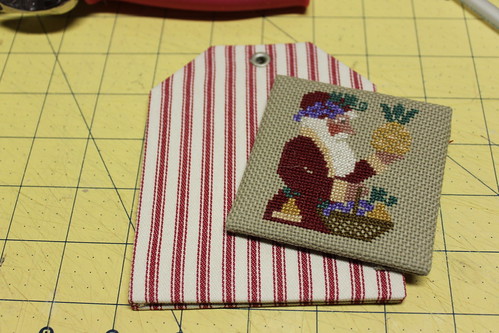
You will end up with two "tag" pieces:
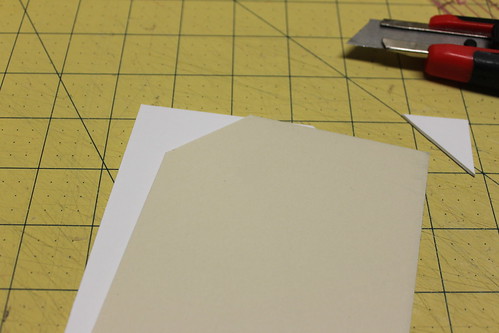
Step 7:
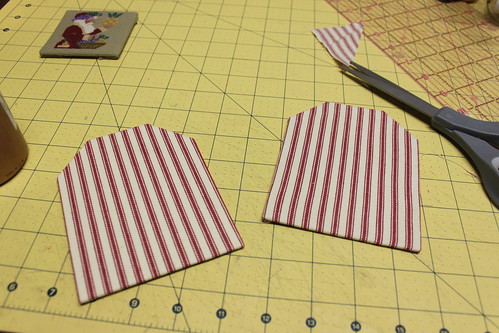
Now spray the two tag pieces LIGHTLY with tacky spray to cover the boards. Let set a few seconds (in fact I pick them up and fan them a little. You want the glue "tacky" not wet... Then mount on your complimentary to your stitched piece fabric for the "tag", gluing with white craft glue the sides to the back. Cut as much of the "extra" fabric off on the sides and particularly the corners as you are gluing the fabric to the back.
WHY? Cutting the "extra" fabric off at the corners especially will help the pieces to lay flush.
They will end up looking like this:
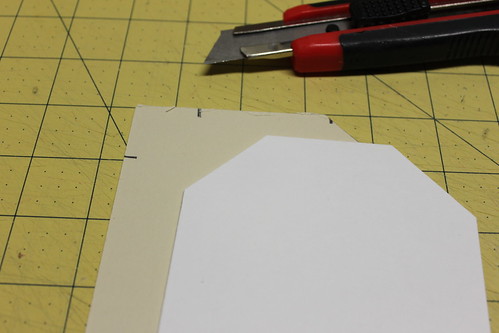
Step 8:
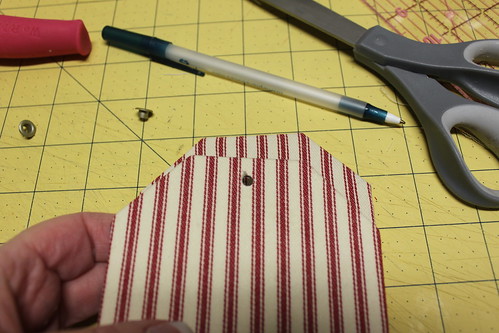
Now we are measuring the center of the "tag" make a small mark on the fabric, please notice the two inch squares on my cutting mat and the dot in the center that I have place about 1/4 inch down from the edge.

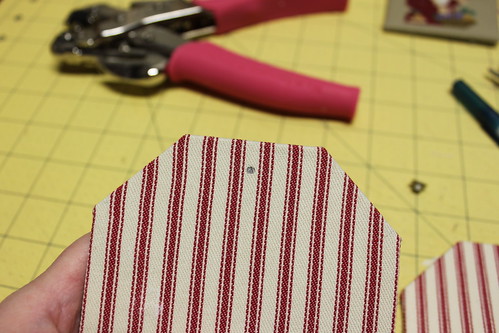
using your Crop-O-Dile, bite and punch the circle:
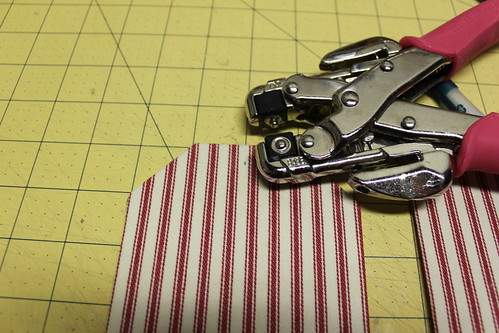
It will end up looking like this:
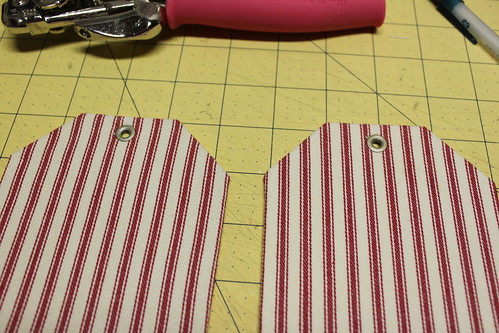
Using the first bitten "tag" as a template, mark where to "bite" the back of the tag:
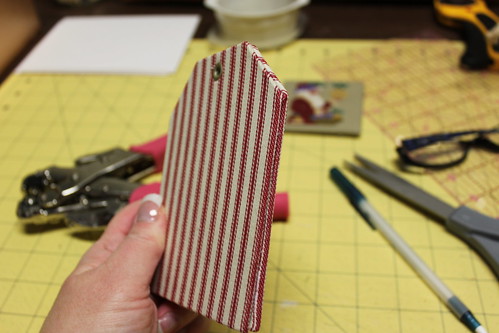
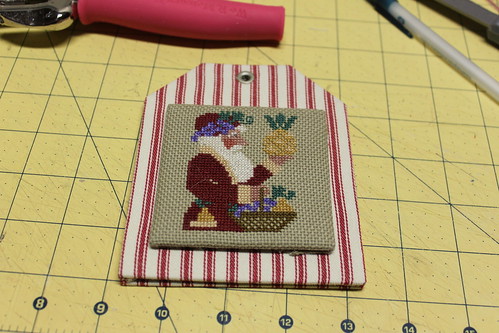
You will end up with two "tags" front and back like these, place the grommets and crimp

Step 9 :
Using Tacky Glue, spread it all around the edges of the tag and then sandwich together, paying attention to the very edges. I use a small paint brush (that I always have on hand) to spread the glue all the way to the edge.
*Helpful Hint*: you don't have to use gobs of glue...be a little sparing with it, that is one thing I have learned as I have "matured" in my finishing. A little goes a long way. See as I state all over this blog: finishing ~ its a process ~ and one is always learning.
Step 10:
Now layer (mount) the stitched piece on top of the tag. Use white craft glue to glue it down.
It will look like this:
Step 11:
Make some cording (see my tutorial The Cording... ) or use purchased cording, chenille, pom-poms, whatever dings your bell... generally lay it around the "face" (mounted stitched piece) and cut to size (be a little generous on your cut!) . Fold in half to find the center and pinch, then glue on the bottom center - laying a small line of glue first up one side to top center. Pin along the edge (if needed) with straight pins to hold in place (with twine and pom-poms you will need to use straight pins to hold it in place perfectly)
Continue to edge the stitching with the twine/cording around the face of the tag.
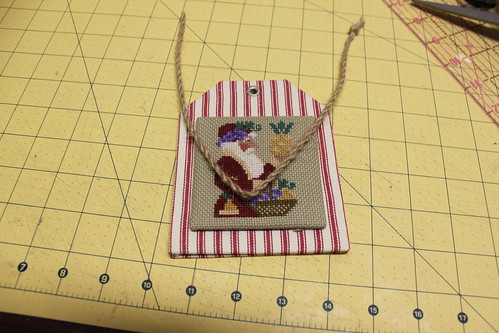
When you are done, it will look like this:
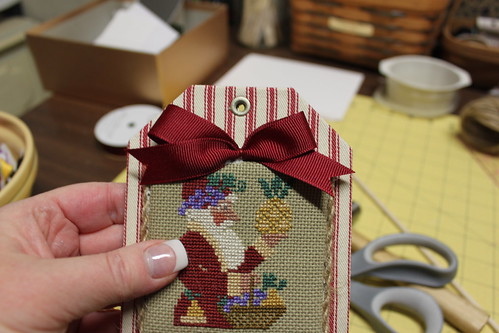
Step 12:
Make a Bow, place a single dot of glue, and using a straight pin attach the bow to the ornament.
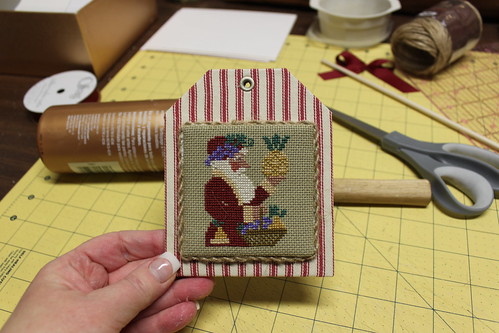
*helpful hint*: You will notice in my photos a small hammer (that I found in a scrapbooking section of the craft store) I use it to save my finger tips when pushing in pins in any of my finishing! Get one, your sore, bloody fingers will thank you! Mine did!
Step 13:
Now make the hanger, by taking twine or string, cutting a length, folding in half to find the center and pinch. At the fold pinch, shove it through grommet.
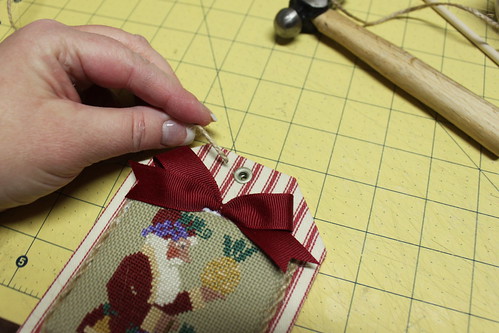
tie a knot in the end with the two "legs" of the hanger and thread it through the pinched center loop
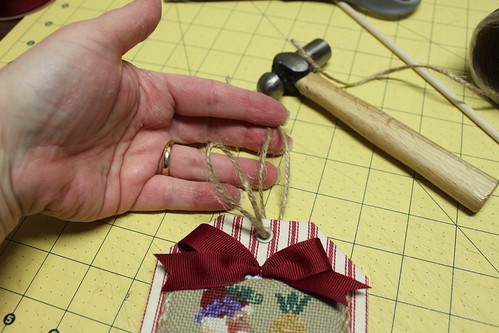
Pull tight!
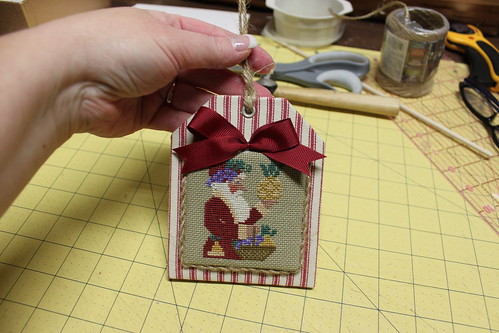
Now you have a beautiful tag ornament that will hang STRAIGHT because of your sweet looped hanger!
Isn't it beautiful and PERFECT!?
Use my tutorials, copy my ideas, use my techniques, hints or tips? Please remember to give credit to my name: Vonna, The Twisted Stitcher ~ Thank you.