
Recycled Cards - Christmas Ornaments
Difficulty Level: Easy
Items Needed:
Christmas Cards
(or any kind of cards - we save all the pretty tops of cards throughout the year to use)
Scalloped Circle cutter
(best sizes: 1.5 inches to 2 inches in circumference plus if the scallops along edge are in an a number divisible by 3 it is easiest: like 15, 18, 21, 24….)
Glue Gun
Something to score the cards
(like steak knife, scissors point, points turner, etc)
Ruler
Twine/ribbon/baker's twine for hanger
STEP ONE:
Cut circles from your cards - get a lot cut so you have a wide range of colors to pick from for scrappy ornaments

STEP TWO:
Using your ruler you are going to score the circles - here is where a circle with scallops divisible by 3 comes in handy. My cutter has 15 scallops that means I am going to score in 5 scallop increments as shown in following pictures:
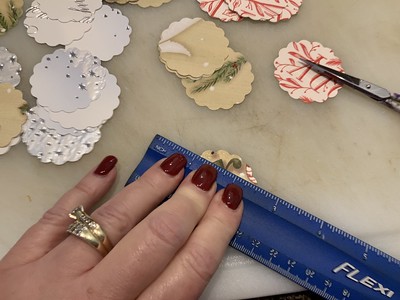

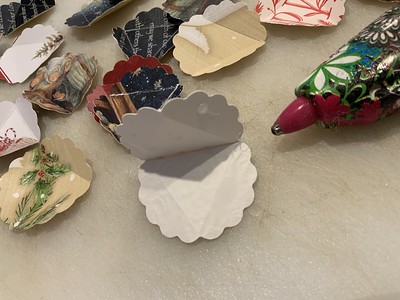
Score each circle three times in triangular shape as shown:

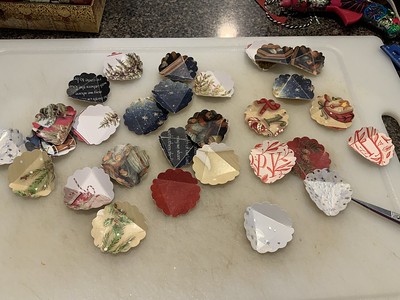
Score lots of circles as it will take 20 scored circles to make one ornament:
STEP THREE:
using your glue gun to glue together the scored circles build your top
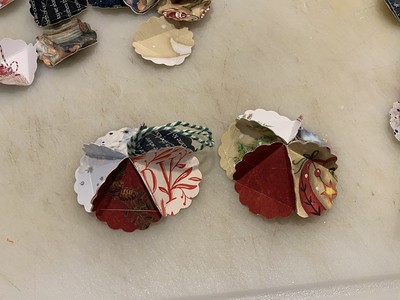
You will do this by connecting 5 scored circles with all the triangle POINTS at the apex as shown below

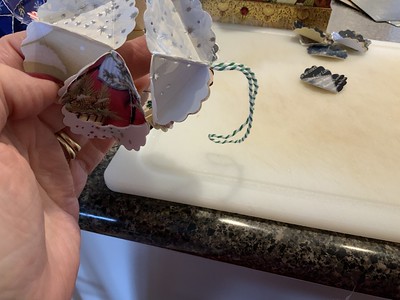
then tying a length of twine/ribbon glue into the top of the ornament with loop out the top as shown:


STEP FOUR:
Make a bottom same as the top, just glue the apex with a dot of glue rather than with a hanger coming out.
STEP FIVE:
building the ornament center. You will need 10 scored circles. You will orient the scored triangles in opposite orientations as show below:
triangle point - flat side of triangle - triangle point - flat of triangle - continue until you have 10 circles connected
^-^-^-^-^-

then complete circle by joining ends:

STEP SIX:
join top, middle and bottom of ornament
to create your finished ornament - (you likely will have to go over the ornament after all is connected to glue together joining joints - this is normal and makes the sphere strong.)

STEP SEVEN:
Hang your sweet ornament on the tree

My girls and I have done this for years. We have them on our trees, we gift them to friends and neighbors with holiday treats....it is a lovely tradition and I love the look of them on our tree.
Just remember, smaller cut circles make smaller spheres, large cut circles make larger spheres.
You can see in this picture: we have spheres made from the same card and then we have scrappy balls made from many different cards. We also will "fussy" cut circles to make subject matter spheres: for example - all snowmen , all nativity, all stars, all snowflakes etc.
So save your cards and recycle them into beautiful Christmas tree ornaments!
Start your own post Christmas tradition!