
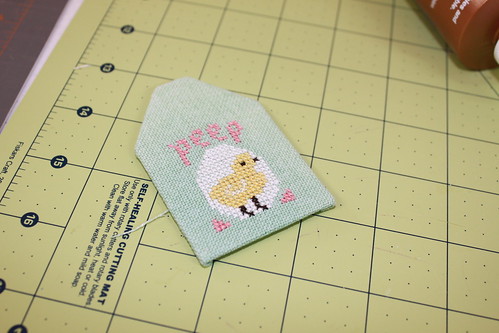
DIFFICULTY LEVEL: Difficult
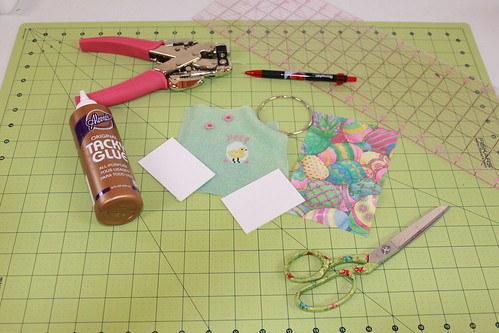
What you need:
- Acid Free Mat Board
- Mack Knife
- Cutting Mat
- Ruler
- Pen
- Crop-o-Dile (or some sort of grommet setting device)
- Grommets
- White Glue (my preference is Aleen's White Craft Glue)
- Floss Ring
- Scissors
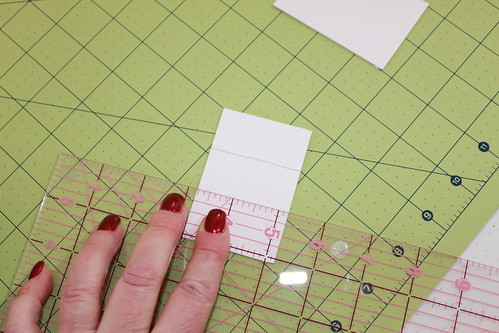
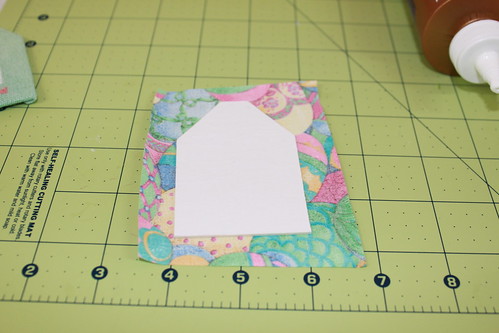
 STEP ONE: measure your stitched piece adding how ever much you want to the right/left and bottom sides (personally I add an extra 1/4 to 1/2 inch to these sides) add 1 inch to the top of the piece for the "tag" part. Cut out the appropriately sized piece of mat board X 2 for top and back.
now measure down 1 inch from the top and draw a line:
STEP TWO:
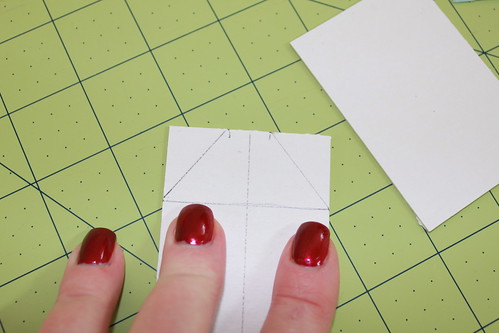
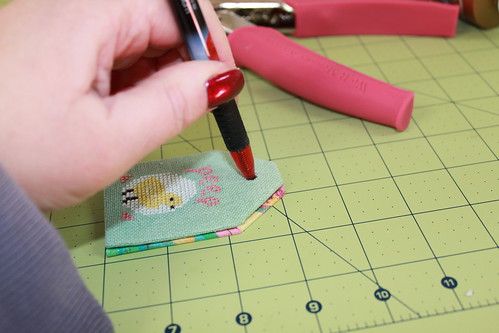
STEP THREE: at the center draw a line down the middle:

STEP FOUR: depending on the size of your tag from the center line measure 1/4 (up to 1/2 inch for larger tags) make a mark on either side. Then using your ruler connect the side line to the top line as shown:
STEP FIVE: Cut off the corners following the cut lines drawn above and using this first shape as a template, line up the pieces and cut the other piece to the same shape as the first piece:
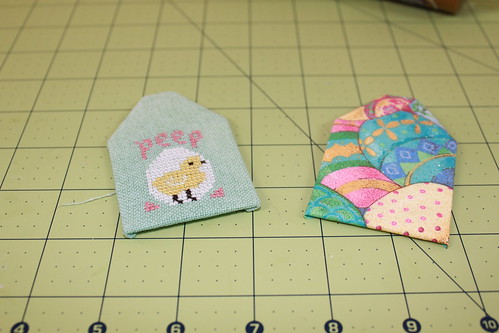
 THEN, you have the front and back tag pieces!
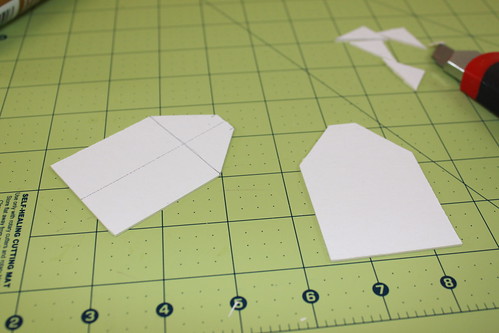
STEP SIX: mount your stitching piece straight onto the mat board by centering and gluing edges to the back. I like to line up the top of my stitching with the corner I cut for the top "tag" part:
 NOW, you have two tag pieces FRONT and BACK!
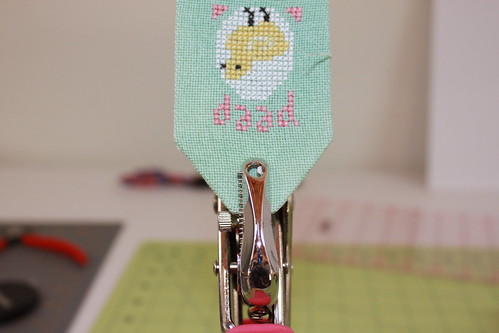
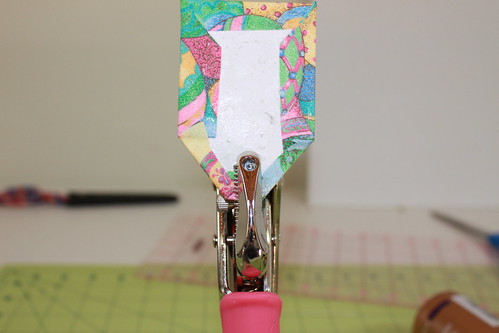
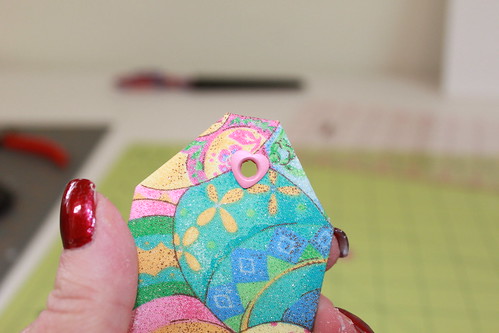
 STEP EIGHT: take your crop-o-dile tool and center the hole punch part inside the top "tag area" and punch:
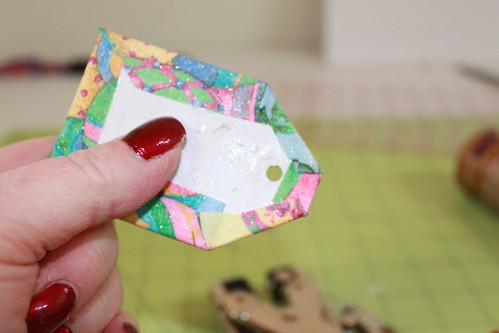
 STEP NINE: using the top portion as a template use a pen to mark where the hole should be punched on the bottom tag:
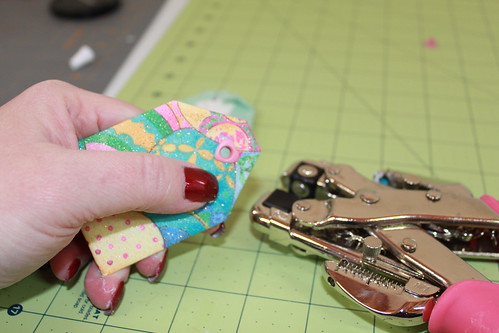
STEP ELEVEN: now get your grommets and crimp them on the front and the back tags using the crimping part of the crop-o-dile:
 STEP TWELVE: put some glue on the inside of the tags and paying attention to lining up the grommet holes, sandwich together. It is a good idea to then place the tag under some weights to make sure that the tag is glued together and very flat. After a couple of hours, pull out the tag, place it on a ring and there you go ~ one beautiful floss tag to use for your stitching or give as a gift to a special friend :)
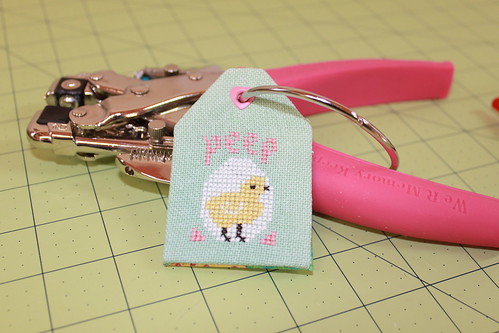 NOTE: you may also add twisted cording, chennile trim, bows, rusched ribbon, etc around the edge of the tag if wanted to "doll it up" a bit.
Floss Tags can also make a cute primitive ornament...pretty sweet, right?!

STEP SEVEN: do the same thing for the back material piece:

 STEP EIGHT: take your crop-o-dile tool and center the hole punch part inside the top "tag area" and punch:

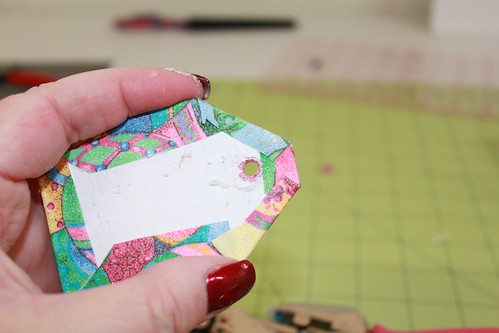
STEP TEN: line up the mark with the punch hole and punch:


STEP ELEVEN: now get your grommets and crimp them on the front and the back tags using the crimping part of the crop-o-dile:


 STEP TWELVE: put some glue on the inside of the tags and paying attention to lining up the grommet holes, sandwich together. It is a good idea to then place the tag under some weights to make sure that the tag is glued together and very flat. After a couple of hours, pull out the tag, place it on a ring and there you go ~ one beautiful floss tag to use for your stitching or give as a gift to a special friend :)
 NOTE: you may also add twisted cording, chennile trim, bows, rusched ribbon, etc around the edge of the tag if wanted to "doll it up" a bit.
Floss Tags can also make a cute primitive ornament...pretty sweet, right?!
Use my tutorials, copy my ideas, use my techniques, hints or tips? Please remember to give credit to my name: Vonna, The Twisted Stitcher ~ Thank you.