
DIFFICULTY LEVEL: MODERATE - MUST BE METHODICAL AND PRECISE IN APPROACH
Things you will need to frame as shown:
Things you will need to frame as shown:
1.) Finished Stitched Piece
2.) Grid Ruler
3.) Ball Head Straight Pins
4.) Upholstery Thread and Sharp Needle
5.) Acid Free Foam Core
4.) Frame; I also use conservation UV protected or Museum glass - this is optional
6.) Logan Points Driver Gun with points
7.) Backing Board
8.) Utility Knife
9.) Stainless Steel Flat Head Straight Pins
10.) Frame Spacers
11.) Hanging accessories (saw tooth hanger or wire hanger hardware)
12.) Rubber Bumper Pads
13.) Information Card
GENERAL INFORMATION:
You want to use all archival/acid free products when you frame your pieces. This will ensure that your pieces remain perfectly preserved through the years. Most reputable framing shops/sites that sell framing supplies will only sell acid free, archival framing products. If it isn't printed on the that it is an archival product ask the sales clerk and they should be able to tell you/point you in the right direction. If they don't know - don't use it. Ask lots of questions, research yourself if you have to do that to get answers. That is what I do.
Do NOT use that nasty Sticky Board. That is NOT archival and will ruin your projects turning them yellow, eating holes into the fabric after a few years. Not to mention if you EVER want to un-frame it to redo or finish in a different way, it is impossible to get all that sticky, coating mess of an adhesive off the back of your stitching.
Step 1:
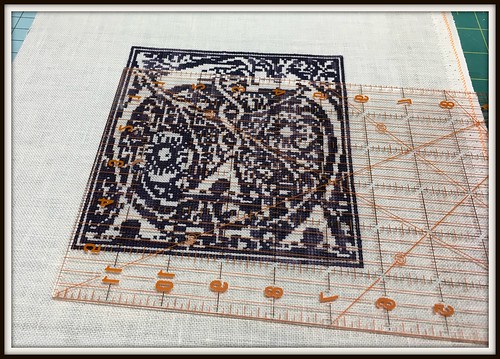
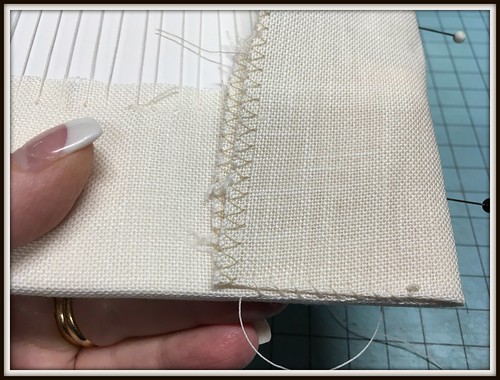
Iron face side down your stitched piece. Ensure that the piece is clean, if you see visible dirt, if you need to wash...then do whatever tried and true practice you use. I do not wash by full immersion so cannot direct you in that technicality.
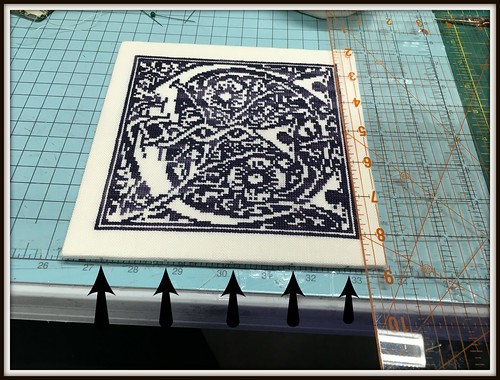
Once ironed and clean, then place stitched piece flat onto clean surface. Measure your piece very well to determine frame size needed. Take into account:
1.) margin you want from stitched edge to frame edge
2.) Write down measurements in inches height and width
Consideration* when looking for frames take into account rabbet width - the overhang of the frame (or lip of the frame) that your piece will sit in. Also consider if you will be using a mat. I typically frame without matting and this tutorial will show framing without a mat, however if you want to use a mat you need to take that into consideration when choosing the size of your frame.
STEP 2: Choose your frame. You can get custom sized frames at Hobby Lobby, Joann's, Michael's, as well as many, many online frame stores. I have used Saline Frame Company a couple of times. They offer ready made custom sizes with simple frame style in a variety of colors. The frame shown was from their company. Any reputable framing department will have archival products and when purchasing the frame will offer that the foam core, bumper pads, hanging hardware will be thrown into the price or at least the hanging hardware and bumpers will be given complimentary while the custom cut foam core will have a nominal fee. I highly recommend getting the foam core cut custom from the frame shop.
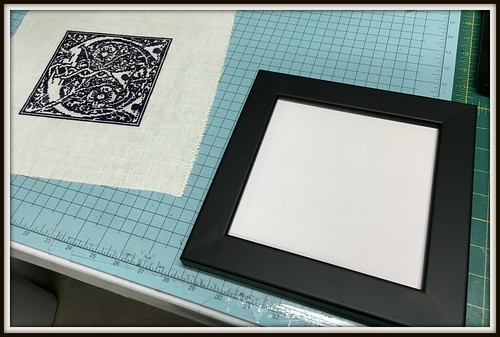
My piece is 5 1/2 H x 5 7/8 wide
My frame is 7 x 7 (I wanted a small margin between stitching and frame edge)
The rabbet width is 1/4 inch
that translates to: top and bottom needs 3/4 inch from edge of stitching to edge of foam core
right and left sides need 5/8 inch margin from edge of stitching to edge of foam core
Measure carefully these measurements top/bottom and sides
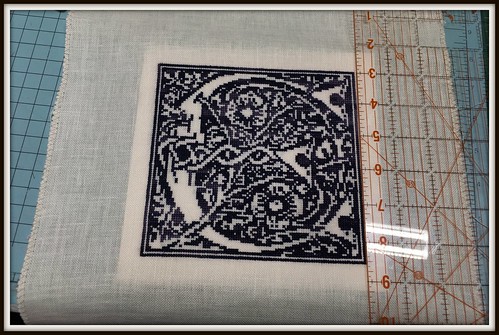
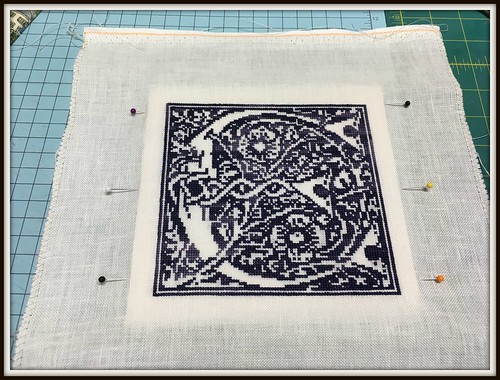
STEP 3: place ball headed pins along the sides of the measured piece to maintain proper spacing on foam core.
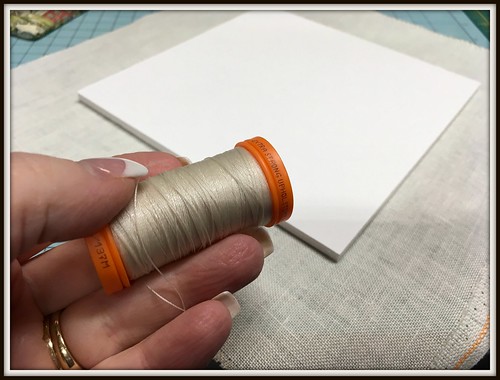
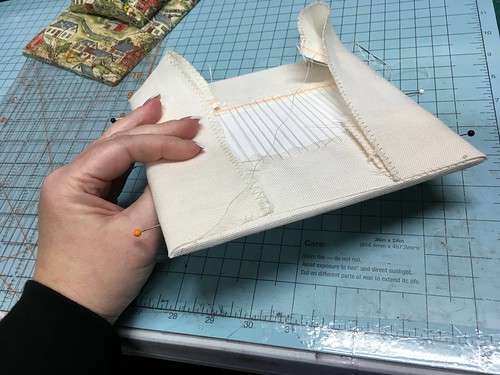
STEP 4: Flip piece and lay face down. Get your Upholstery Thread (this is very durable strong thread for lacing, this is what I use exclusively for lacing on framing and when I lace for my other finishing)
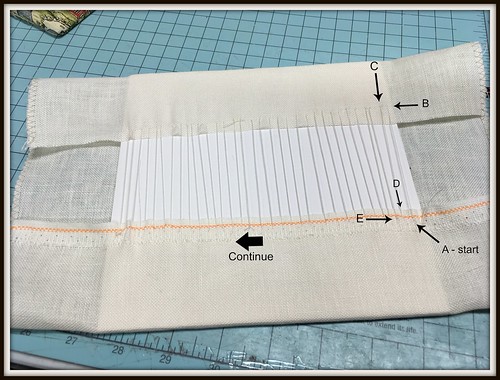
STEP 5: Lace the top and the bottom by beginning on the edge at point A (see below) secure with knot, then travel up to B - scoop a stitch to point C, then travel down to D - scoop a stitch to Point E and repeat all along the length of the foam core.
HINT: do not pull tightly as you don't want puckers on the linen. Check frequently the front side to ensure you are maintaining proper spacing and that the linen threads are square and not wavy or slanting on the front.
STEP 6: Check you spacing measurements - if you need to tweak a bit, just gently slide the linen around - you do not have to undo the lacing just slide it to fix measurements.
STEP 7: Now place face down on flat surface again and fold corner in just a bit before whip stitching corner into place as shown below:

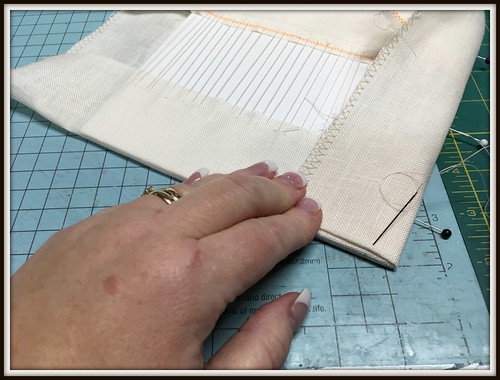
STEP 8: do the same thing as above to opposite corner
STEP 9: Begin lacing side to side
STEP 10: when you reach the other corner(s) fold and whip stitch into place.
HINT*again do not pull forcibly, just enough to hold the piece in place squarely.
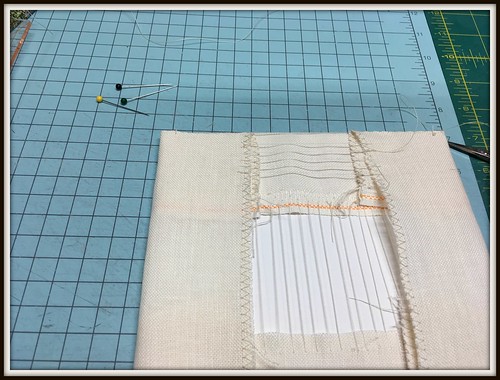
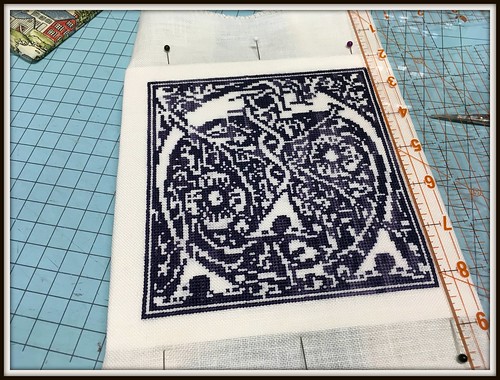
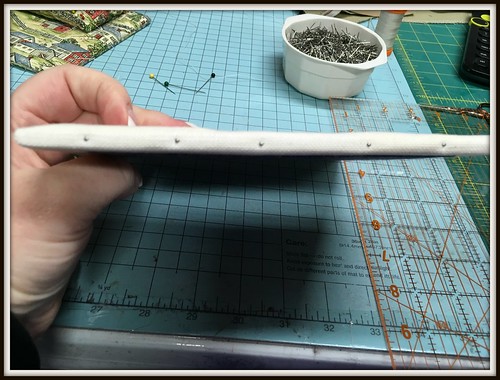
This is what it should look like when completely laced:
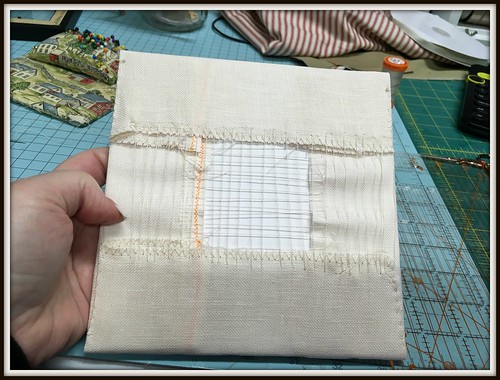
STEP 11: again check your margins and when perfect, add some stainless steel flat head pins spaced about an inch apart on all four sides, as shown below, this is to ensure that the piece stays in one place securely without shifting. (this is probably overkill on my part, but I like to do this)
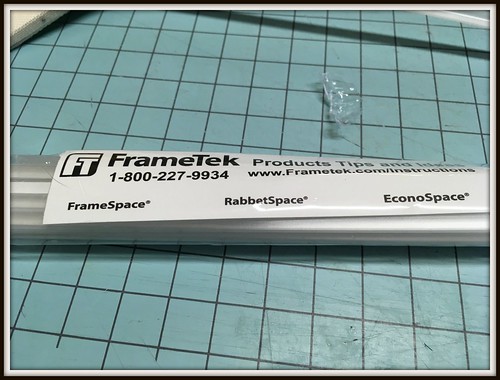
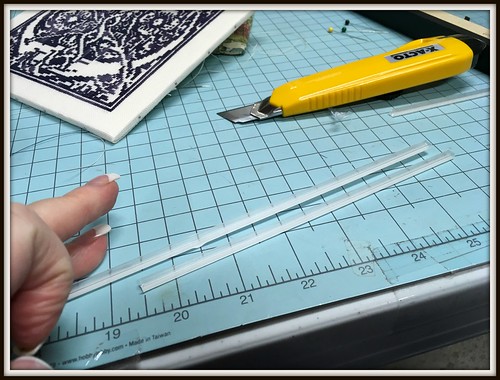
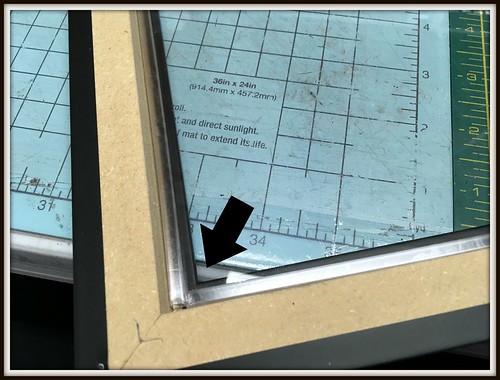
STEP 12: Since I do not use mats, I don't want my stitching smashed against the glass. Therefore, I use frame spacers. These are wonderful archival, plastic spacers that I purchase online from FRAMETEK I get mine in 1/8" clear. WHY do I use them? because they allow for an air space between the glass and whatever you are framing. This allows my stitches to be viewed perfectly, cleanly without distortion. It also allows for air to freely move through my framed pieces and helps in their preservation (so that humidity does not affect them by being trapped on glass and affecting linen.
You simply cut the frame spacers to size:
Pull off adhesive tape:
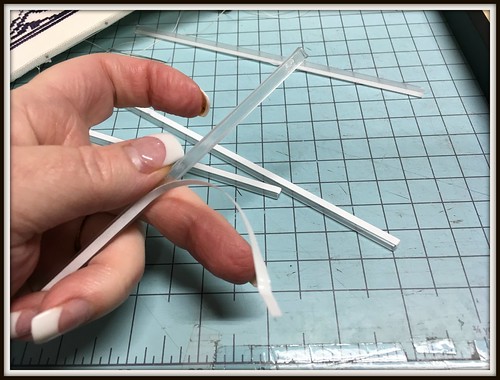
And stick on glass in rabbet space:
I do it on all four sides
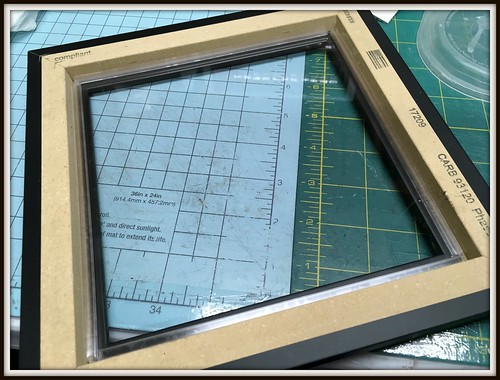
Step 13: Place your laced stitched piece inside frame (after ensuring glass is completely clean and smudge free - I use vinegar water spritz and clean with newspaper for smudge free glass)

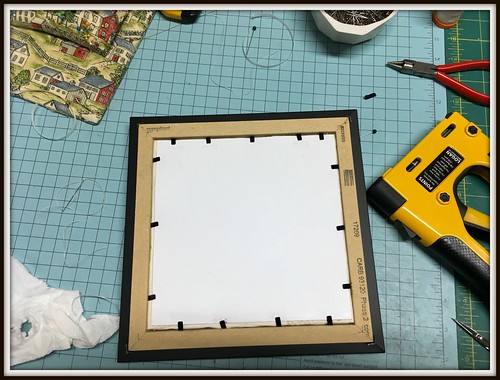
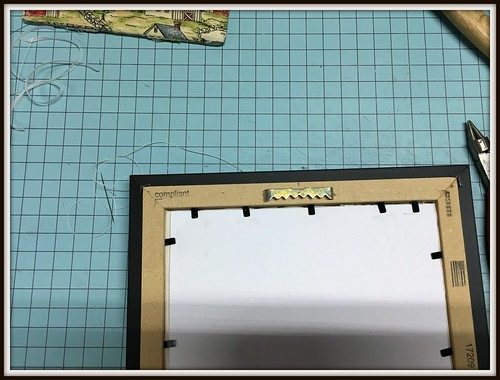
STEP 14: Cut a piece of backing board (I use mat board) and take your Logan Points Gun Driver and drive points evenly space around framed piece. The points hold everything inside the frame, you want to use firm pressure when driving the points.
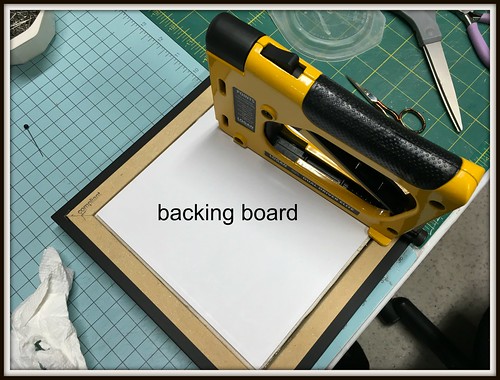
When done it should look like this:
STEP 15: Add your hanging hardware - I use saw tooth hangers for frames less than 10 inches
STEP 16: I have stickers that I put on the back of each framed piece that gives general information about what I stitched, since this is a gift I just put to whom I gifted, dates and my name. On my personal pieces I also put all piece information (Designer/Design/Fabric count and color/my name and date)

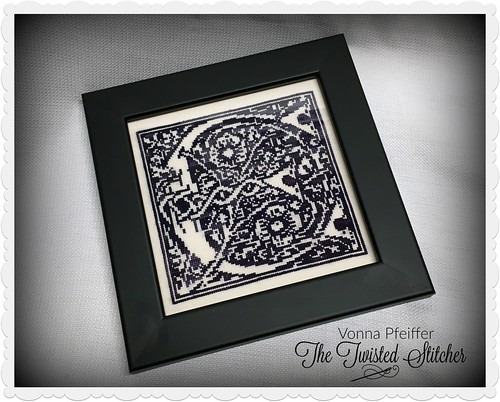
Stand back and admire your work.
NOTE: (not pictured) but I also place plastic bumpers framing bumpers on the bottom two corners. WHY? because again we are talking air space...plastic bumpers allow for air to travel freely behind your work so that moisture/humidity is not trapped between the frame and the wall and possibly harming your work.
Use my tutorials, copy my ideas, use my techniques, hints or tips? Please remember to give credit to my name: Vonna, The Twisted Stitcher ~ Thank you.