Items you will need:
1.) stitched piece with coordinating backing fabric
2.) sewing machine and/or thread and needle
3.) filling such as: crushed walnuts (sold as lizard/bird litter), polyfill stuffing, poly pellets, etc.
4.) trim such as: chenille trim, cording, braiding, etc.
Step 1:
Trim linen to 1/2 inch on all sides from edge of stitching and cut a piece of coordinating material to exact size of the trimmed stitched piece

Step 2:
Pin the two pieces together (right sides together)
NOTE: I sometimes will use iron-on interfacing on the stitched piece especially if I know it will be used as an actual pincushion and not just as a "pretty". Purchase this at your local sewing/craft store and follow the directions.
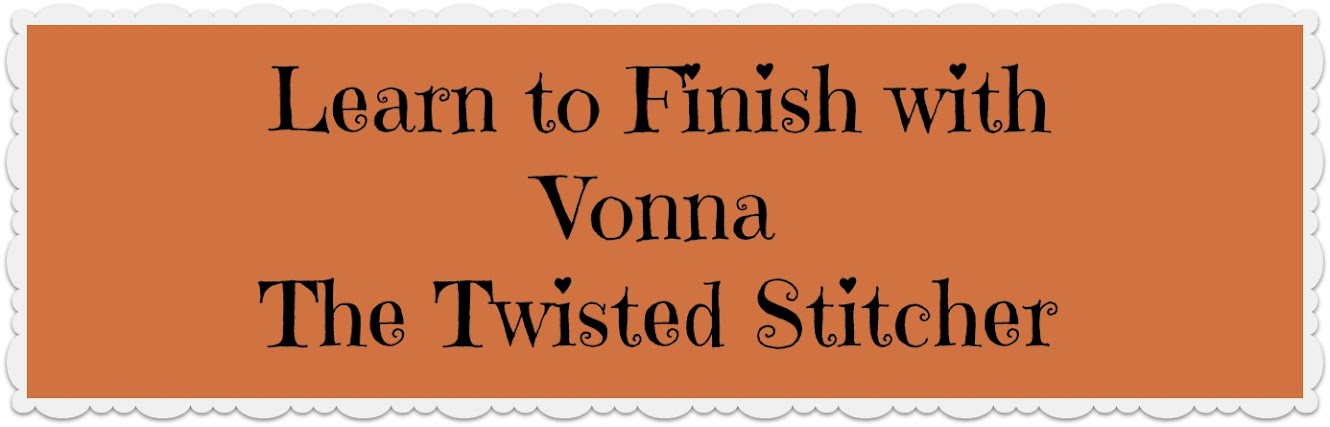
Step 3:
Using a 1/4" seam allowance sew around all four sides of the piece leaving about a 2" space for turning at the side.

Step 4:
Cut diagonally on all four corners (close to the seam but not INTO the seam) this will rid the corners of bulk. Once this has been accomplished - turn out.
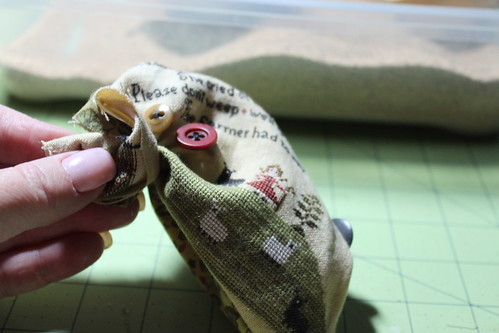
Step 5:
Using this handy dandy corner poker outer (sorry I don't know the technical term) gently poke out the corners until smooth (key word here is gently if you go at it like mad, you'll make a hole in your linen/material and there will be problems).
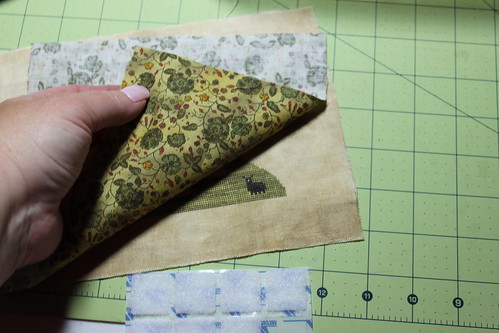
Step 6:
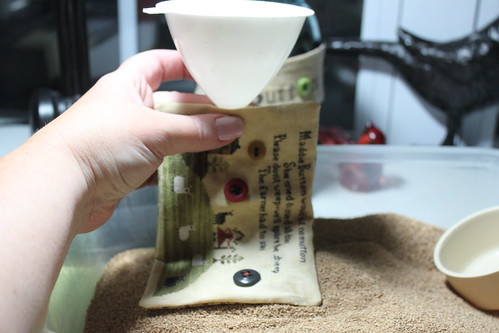
Iron, then fill with your stuffing of choice. I use crushed walnuts. Fill/Stuff until the cushion is tight.
Step 7:
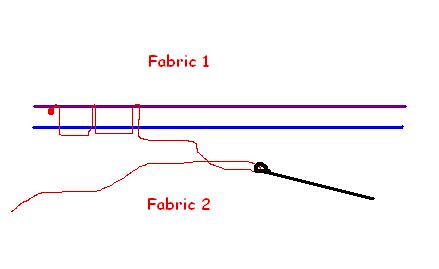
Close the opening using the blind stitch as shown:
Step 8:
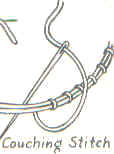
Couch chenille trim along the seam as shown in diagram:
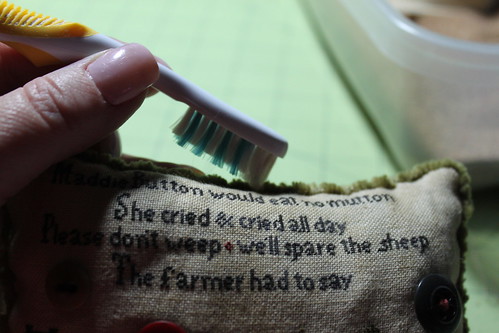
continue in this manner until the ends meet, then end off and clip. Finally, Use a toothbrush to gently fuzz up the chenille to fill in any gaps and to make the clipped ends disappear:
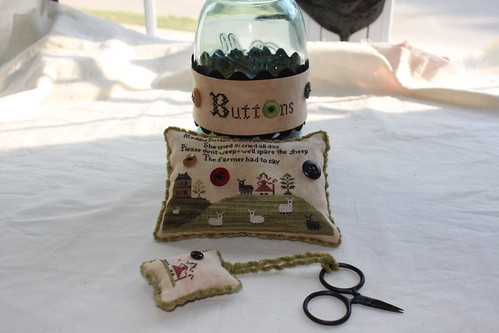
The Finished Pincushion:
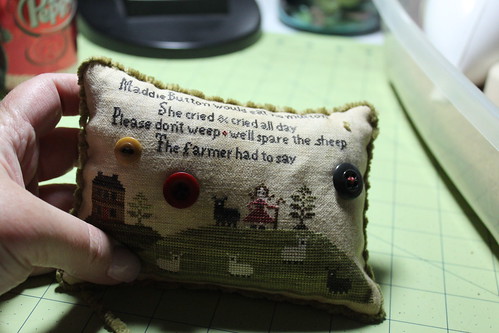
"Maddie Button" Pincushion
Designed by: The Scarlett House ~ Tanya Brockmeyer
Copyright 2011
Information on the designer, where to purchase the design and other wonderful designs by Tanya may be found at The Scarlett House
*Please also see my other tutorials located on this blog to make The Fob and The Button Jar Wrap*
*Please also see my other tutorials located on this blog to make The Fob and The Button Jar Wrap*
Use my tutorials, copy my ideas, use my techniques, hints or tips? Please remember to give credit to my name: Vonna, The Twisted Stitcher ~ Thank you.